A practical, vendor-neutral guide for CIOs, IT directors, and digital workplace leaders evaluating SharePoint consulting partners in Australia — including a comparison...
How to move on-premises and network file shares to SharePoint Online with structure, metadata, and permissions intact, using Microsoft’s tools, documented limits, and remediation techniques.
By Sachin Jain, SharePoint Practice Lead, Beyond Intranet
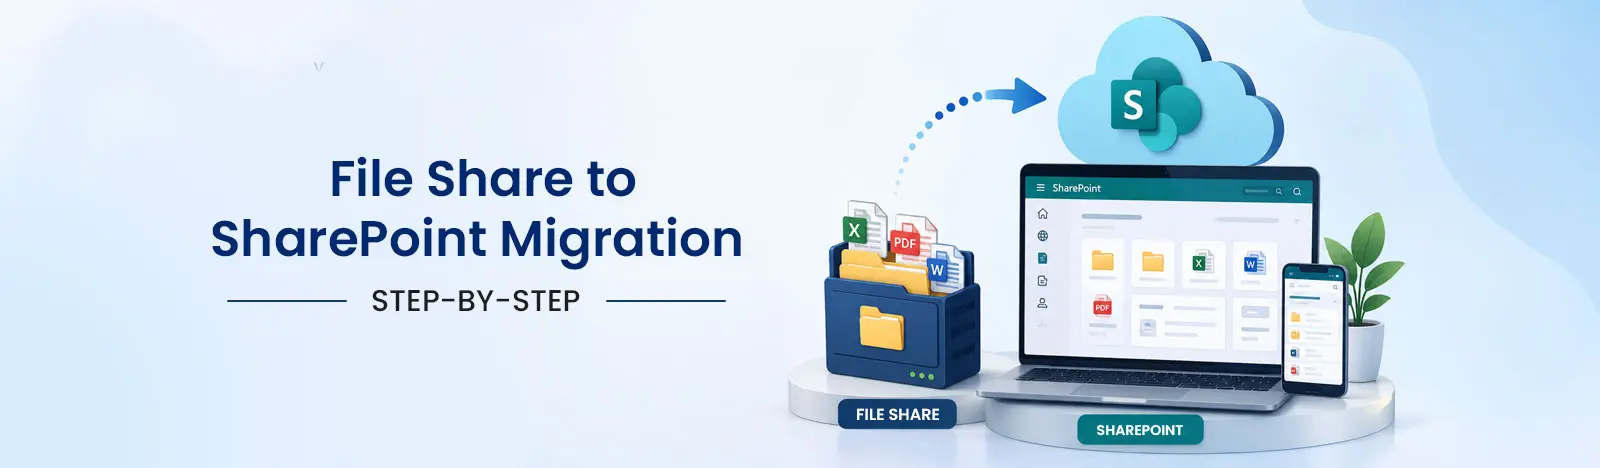
File share to SharePoint migration is the process of moving documents from on-premises or network file shares into SharePoint Online, OneDrive, or Microsoft Teams while preserving folder structure, metadata, permissions, and version history. Microsoft supports this natively with two free tools, the SharePoint Migration Tool (SPMT) and Migration Manager, and publishes a five-phase framework for running it well.
If done properly, a migration is more than a file copy. It is the one moment you can reorganize content around how teams work, retire years of redundant data, and apply modern governance before it hardens in a new home.
As a Microsoft Solutions Partner, we run these projects to Microsoft’s documented guidance rather than around it. This guide consolidates that guidance, the two tools, the five phases, the exact platform limits, the remediation techniques for each limit, and the automation options, into one place, so your plan is grounded in what the platform actually does. It is also the canonical reference for our companion articles on preserving metadata and avoiding the seven common failures.
Microsoft’s five-phase migration framework
Microsoft frames a successful file share migration in five phases: assess, remediate, prepare the target, migrate, and onboard users. Every step in this guide maps to that framework. The two phases teams skip most often, assess and remediate, are the two that cause the most overruns, because unremediated content fails silently mid-migration rather than up front.
Choosing the tool: SPMT vs Migration Manager
Both tools are free with Microsoft 365, and both preserve metadata, permissions, and version history. The difference is scale, orchestration, and how much you want to automate.
Factor
SharePoint Migration Tool (SPMT)
Migration Manager
Best for
Smaller file shares, SharePoint Server, and scripted or repeatable jobs
Large, multi-share enterprise migrations run by a team
Runs on
A single desktop or server you manage
Agents connected through the SharePoint admin center
Scaling
One machine (though you can run parallel tasks)
Agent-based, load-balanced across many machines
Scanning & reporting
Basic task summaries and logs
Pre-migration scanning, dashboards, central task management
Automation
Full PowerShell cmdlet support and CSV/JSON bulk input
Console-driven with agent orchestration
Throughput
1 to 2 TB per agent per day for file shares
Higher via multiple agents in parallel
A practical rule: use Migration Manager when many people need visibility into a large, multi-share cutover, and use SPMT when you want a controlled, scriptable job, especially if you intend to automate repeated or incremental runs.
Running SPMT in practice
SPMT accepts three inputs: a single source and destination through the interface, a bulk list through a CSV or JSON file, or full automation through PowerShell.
Bulk migration with a CSV or JSON file
For anything beyond a handful of folders, drive the job from a file. In SPMT, choose Add new migration, then Bulk migration using JSON or CSV file, and provide the full path. The minimum required values are the SourcePath and the TargetPath, with one migration mapping per row; the source columns describe where the data lives and the target columns describe the destination site, document library, and optional subfolder. Building this mapping file is also the cleanest way to flatten a deep folder tree, because you decide the destination path per row rather than mirroring the source.
Automating with PowerShell
For repeatable and incremental migrations, Microsoft provides SPMT PowerShell cmdlets so a job can be scheduled and re-run without touching the interface. A typical sequence registers the session, adds one or more tasks, and starts the migration:
Re-running the same task performs an incremental pass, moving only new or changed files. That is what makes a short final cutover possible: you run the bulk of the data days ahead, then a fast delta pass at go-live.
The step-by-step migration process
Assess and inventory. Capture total size, file count, the largest and oldest files, folder depth, and current NTFS permissions. Migration Manager’s scanning does this centrally; for SPMT, script a directory report. This baseline sets your timeline and exposes the remediation work.
Remediate blockers before you move. Microsoft documents hard limits that fail files silently: a 400-character limit on the full decoded path, a set of invalid characters and reserved names, and a 250 GB maximum file size. Fix these first (techniques below).
Clean up ROT data. Remove redundant, obsolete, and trivial content so you migrate only what has value. On a typical aged share this alone removes a large fraction of the volume, cutting both cost and elapsed time.
Design the target architecture. Map shares to SharePoint sites and document libraries organized around teams and processes, not a copy of the old tree. This is the moment to flatten deep paths that would otherwise breach the 400-character limit and to plan managed metadata columns.
Plan and simplify permissions. Translate NTFS folder permissions into a small number of SharePoint groups and roles. Do not carry per-folder permission sprawl across; collapse it, because it will be far harder to unwind after go-live.
Prepare the target and run a pilot. Provision destination sites and libraries, apply your DLP and sharing settings, then migrate one representative share and validate structure, metadata, permissions, and user access before scaling.
Migrate in waves with incremental sync. Both tools support incremental passes, so each run moves only changed or new files and the final cutover is short. Sequence waves by team so support can focus.
Validate every wave. Reconcile source and target file counts, spot-check metadata and version history, and confirm permissions on each wave, not only at the end.
Cut over and onboard users. Set the source share to read-only to prevent version conflicts, redirect users, and deliver short role-based training. The onboard phase is what turns a technical success into an adopted one
Limit
What Microsoft documents
Source
Path length
The entire decoded path, including the file name, cannot exceed 400 characters
These are the constraints that most often derail a file share migration. This section is the reference our other migration articles point to, so plan around all of them before the final wave.
How to remediate each blocker
Long paths (over 400 characters): flatten the destination structure during the assess-to-design step. Because you control the TargetPath per row in the CSV or JSON mapping, you can collapse a ten-level source tree into a shallow library without renaming anything.
Invalid characters and reserved names: run a rename pass at source, or use the tool’s reporting to list offenders and remediate in bulk. Standardize on replacing ” * : < > ? / \ | with a safe character.
Oversized files (over 250 GB): these are rare but real for disk images and media. Identify them in the assess phase and handle them out of band; they will not migrate through the standard tools.
Throttling and throughput: Microsoft throttles heavy load, so plan waves around the documented 1 to 2 TB per agent per day and scale with multiple Migration Manager agents rather than pushing a single machine harder.
Pre-migration checklist
Full inventory of size, file counts, folder depth, and permissions captured
ROT data identified and cleared with the business
Paths over 400 characters, invalid names, and files over 250 GB remediated
Target sites, libraries, permissions, and DLP configured
Identity mapping confirmed so authorship resolves after the move
Pilot completed and validated field by field
Cutover plan with source set to read-only and a user communication ready
Yes. Microsoft states that SPMT and Migration Manager preserve file structure, metadata, permissions, and version history when configured correctly. See our companion guide on preserving metadata for the mechanics.
Yes. SPMT supports PowerShell cmdlets (Register-SPMTMigration, Add-SPMTTask, Start-SPMTMigration) and CSV or JSON bulk input, so jobs can be scheduled and re-run incrementally.
Microsoft's performance guidance is roughly 1 to 2 TB per agent per day for file shares. Actual time depends on average file size (many tiny files are far slower per GB than few large ones) and how many agents run in parallel.
SPMT for smaller, scriptable, or SharePoint Server jobs; Migration Manager for large multi-share migrations that need central scanning, reporting, and agent scaling.
Not usually. Microsoft's free tools cover most file-share migrations. Third-party tools add value for very complex mappings or mixed-source consolidations.
Sachin Jain is a Solution Architect at Beyond Key, based in Dallas, Texas. He specializes in designing and delivering enterprise solutions using Microsoft 365, SharePoint, and the Power Platform. He has led numerous digital transformation initiatives focused on automating business processes, building modern intranet solutions, and integrating enterprise systems with Power Apps, Power Automate, and Power BI.
Passionate about innovation and problem-solving, Sachin focuses on creating scalable, user-friendly solutions that bridge technology and business needs.