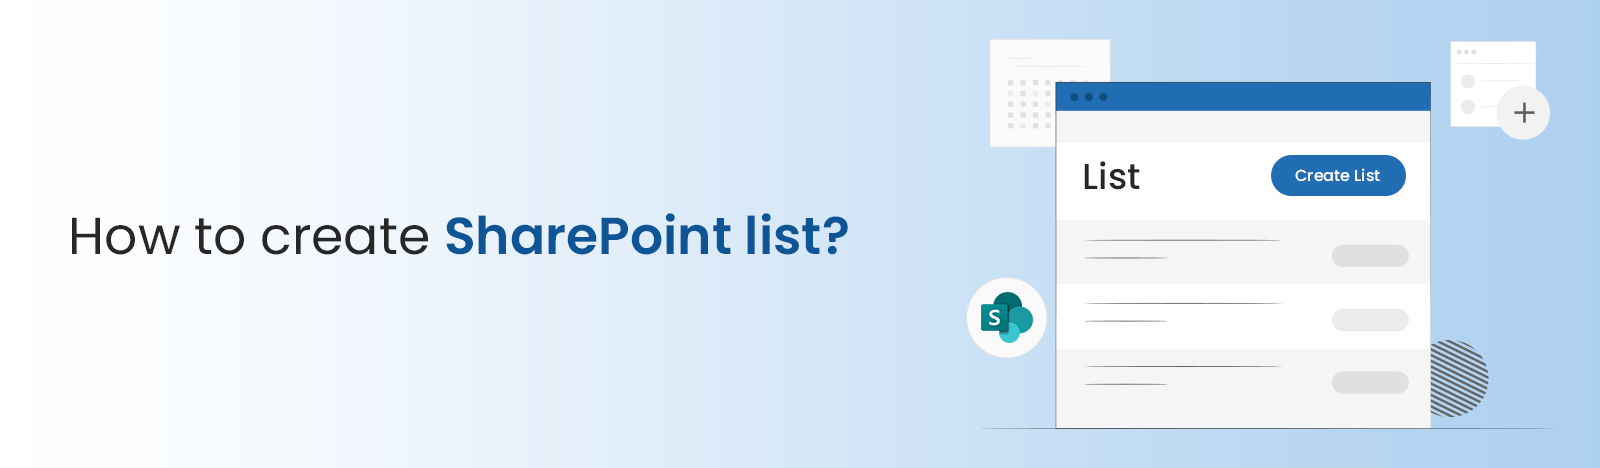
What Is RFx? A Guide for Microsoft 365 Procurement Teams
By beyondintranet / July 9, 2026
RFx stands for "Request for X." The X swaps out depending on what you're asking suppliers to provide. RFI when...
Read More


A SharePoint list is a collection of data that offers a flexible way for you and your co-workers to organize information. SharePoint list use tables in SQL server databases or excel spreadsheets with columns, fields, or properties. These lists can also contain one or more attached files.
Lists make it easy to create and share information with anyone on your network. They also keep everyone in sync with smart rules and collaboration features. SharePoint owners can customize SharePoint Lists based on their specific business needs.
Users can create SharePoint lists in several ways: import from an Excel spreadsheet, migrate from an existing SharePoint list, or leverage the SharePoint templates available. Microsoft SharePoint provides the following eight default list templates.
1. Issue tracker
3. Events itinerary
4. Asset manager
5. Recruitment tracker
6. Travel requests
7. Work progress tracker
8. Content scheduler
To create a SharePoint list, navigate to your SharePoint site, click the gear icon and select ‘Site contents,’ then click ‘New’ and choose ‘List’ — you can start from a blank list, import an Excel spreadsheet, or use a pre-built template. Once created, you can add custom columns, configure multiple views, set granular permissions, and connect the list to Power Automate workflows directly from the list settings panel.
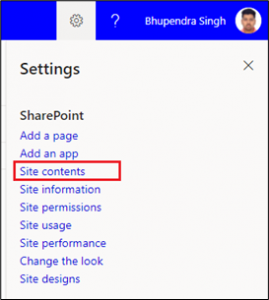
1. Go to the site collection where you want to create the list.
2. From the top right click on the ‘Gear’ icon and select ‘Site contents’.
3. From the site contents page click on the ‘+ New ’
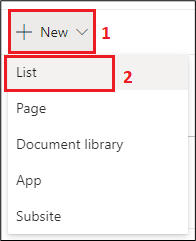
4. From the ‘Create a SharePoint list page, select one of the following options:
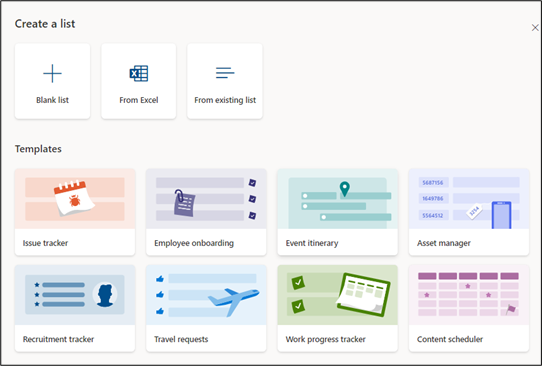
a. Blank list: Choose this option to start from scratch. Give your list a Name, Description(optional), and select any other options you want. The list will save to ‘My lists’ unless you choose one of your SharePoint sites or Teams from the ‘Save to’ When you finish selecting options, click ‘Create’.
b. From Excel: Choose this option to create a list based on an Excel spreadsheet.
c. From the existing list: Choose this option to save time and create a new list based on the columns in another SharePoint list. Your new list will start with the same columns but will not have any data.
d. Templates: Select a template, such as an ‘Issue tracker,’ to see what columns the template has. You can then scroll through sample data to see what to include. Select the templates that fit your specific needs. Click the ‘Use Template’ button
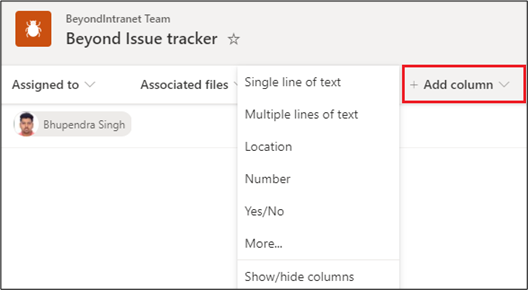
5. Once you create the list, you can open it. If required, you can add new columns by selecting ‘+’ or ‘+Add column’
6. You can share the list with your co-workers. Determine their access level by choosing either “Full control, Edit, or View” permissions.
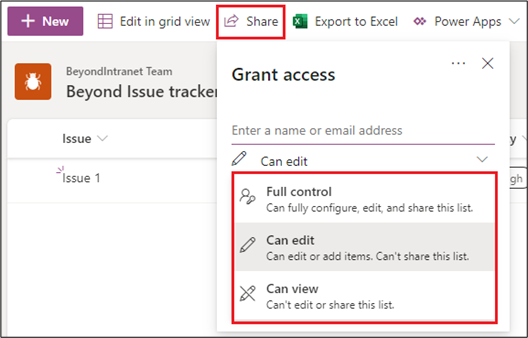
7. You can export the list to an excel file.
8. You can integrate the list with Power Apps and Power Automate integration as needed.
![]()
Get Expert SharePoint Guidance Today
Schedule Free consultation nowSharePoint lists are an important feature that helps organize your work and track key information. It has integration with Microsoft PowerApps, Microsoft Power Automate, and Microsoft Teams which make it more powerful. SharePoint has an iOS and Android app which helps users to work remotely on their list. With these simple steps- you can create SharePoint lists all by yourself.
If you have any questions or doubts regarding Lists, feel free to connect with our Office 365 experts. Email us at [email protected] to request a free consultation.
 Bhupendra Singh