Breaking the 90-Day Cliff: Why Your Onboarding Is Failing New Hires and How to Fix It?
By beyondintranet / March 30, 2026
New hires of a company tend to face a 90-day cliff where they choose whether they are going to stay...
Read More


Handling projects and tasks isn’t always easy. Teams often end up using different tools for files, emails, and tracking work. SharePoint Online and Microsoft Planner can help you keep everything in one place. Using Planner inside your SharePoint Online Team Site means you can assign work, organize tasks, and see progress without leaving the site.
This guide shows every step. You’ll see why each one matters, get troubleshooting tips, and find answers to common questions. It works for both SharePoint admins and people new to these tools.
Microsoft has recently introduced tremendous capabilities to integrate SharePoint Planner directly into SharePoint team sites as a Plan and as a web part.

Microsoft Planner is a visual app included in Microsoft 365. It lets you:
When you put Planner into your SharePoint Online Team Site, you:
Remember, Planner integration works only in SharePoint Online Team Sites. Communication Sites can show a Planner Web Part, but you can’t create or manage plans there.
Only SharePoint Online Team Sites support SharePoint Planner integration. Team Sites focus on group work and let you use Planner fully. Communication Sites are for sharing news or info with large groups. You can add a Planner Web Part to Communication Sites, but can’t make new plans there.
If you aren’t sure what type of site you have, check with your admin or see which template you used.
Schedule Your Complimentary Consultation Now
Talk to Our Expert Now1. Go to Your SharePoint Online Team Site
Open your browser and go to the Team Site where you want to create the plan.
2. Start a New Plan
Find the “New” button near the top left. Click it. Pick “Plan” from the list.
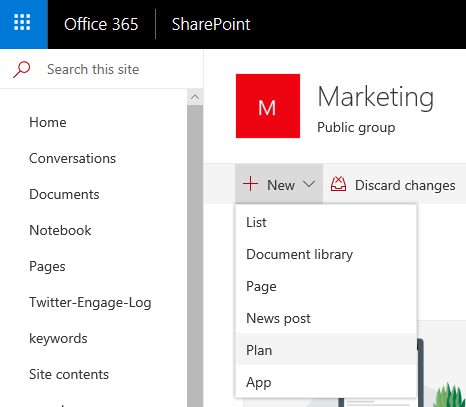
If you don’t see “Plan,” you might not be in a Team Site, or your admin may have turned off Planner features.
3. Name the Plan
A panel or box appears. Type a name for the plan. Click “Create.”
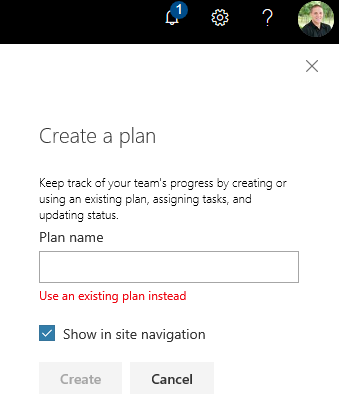
When you do this:
Some teams already have a plan made somewhere else, but still connected to the same Microsoft 365 Group. You can add it to your SharePoint Online Team Site.
After clicking “New > Plan,” pick “Use an existing plan.” Find your plan in the dropdown. Click “Create.”
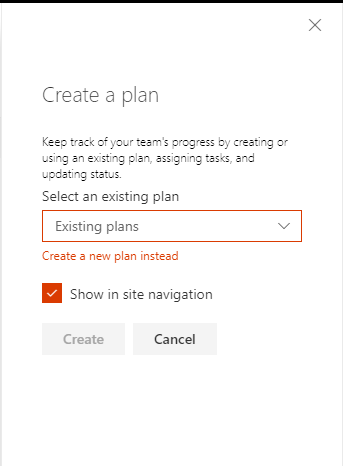
Only plans tied to your site’s Microsoft 365 Group show up. You can’t pick plans from other groups.
Go to the page where you want to show the plan. Click “Edit” at the top right.
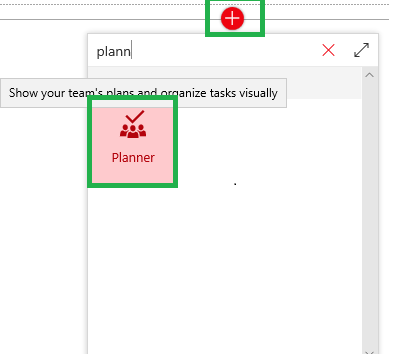
Move your mouse above or below other web parts, or under the title. Click the “+” button. Type “Planner” in the search box and choose “Planner.”
3. Connect the Plan
You can:
Figure 4 — Select Planner web-part
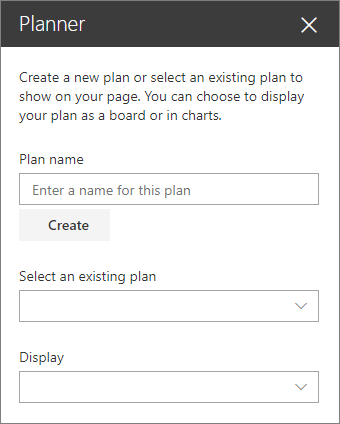
Set how the plan appears. You can show the Board view to see tasks in Buckets, or use Charts to see visual progress.
4. Pick a Display
Set how the plan appears. You can show the Board view to see tasks in Buckets, or use Charts to see visual progress.
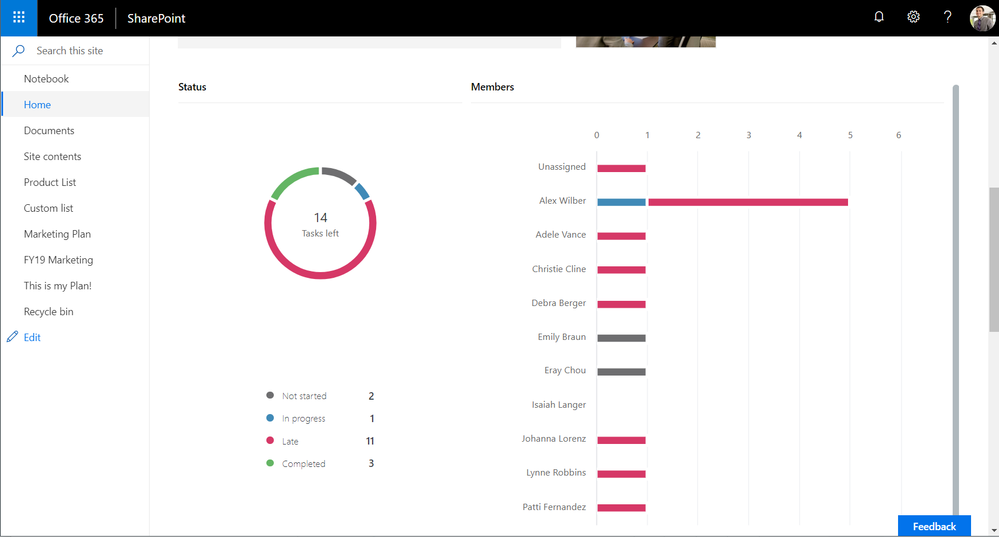
Planner Chart Display
SharePoint web parts help you quickly glean and access relevant information, from internal news to shared documents. The new Planner web part adds to this experience, allowing you to add plan information directly on pages and news posts. Depending on what task information you think is most relevant to your team, you can choose between the Planner Board or Charts view to appear on your homepage.
Make sure to give this web part a clear name, like “Project Tasks.”
5. Save and Publish
Click “Republish” or “Publish” at the top right. Now your page is updated with the Planner board.
With Planner in SharePoint Online, you can:
SharePoint Online and Planner give you a single place to manage work and see progress.
Practical Use Cases
Q1: Can I use Planner integration on all SharePoint sites?
No. You can only create and manage plans in SharePoint Online Team Sites. Use the Planner Web Part for display on Communication Sites.
Q2: Who can see and edit my plan?
Everyone in your SharePoint Online Team Site (including guests, if allowed) can see and edit the plan. Permissions match your site membership.
Q3: What if I don’t see the Planner option or web part?
You might be on a Communication Site, or your admin may have turned off Planner. Also, check if your Microsoft 365 license supports Planner.
Q4: Can I display more than one plan on a page?
Yes. Add multiple Planner Web Parts to a page and link each one to a different plan.
Q5: Can Planner tasks show up in a calendar?
Not in the web part, but you can sync tasks with due dates to Outlook if your group allows it.
Troubleshooting and Tips
If you can’t find the Planner Web Part, check if you’re in a Team Site and have the right permissions. Only plans tied to your Microsoft 365 Group will show up when adding an existing plan. If new members can’t see the plan, have them refresh the page or open Planner from office.com. For more task views, go into Planner itself where you can group by due date, label, or assignment.