A majority of enterprises today look up to technologies that help them build and support customer relationship management (CRM) regimes. Software like Salesforce fits the bill – by breaking down the silos between departments while providing companies a comprehensive view of their customers’ activities everywhere they interact with their brand.
Today, Salesforce is a leading enterprise platform-as-a-service (PaaS) solution that aligns with businesses perfectly by enabling developers to build, test, and resolve defects in cloud applications before deployment. In addition, Salesforce provides several other solutions and services to automate business processes, integrate with external applications, and provide a responsive layout to users. Moreover, it offers updates that are quick and easy, making it easier to solve business challenges.
Although Salesforce nudges companies toward better productivity with its vast features and offerings. But sometimes it might be critical for the technology team to bring in the right kind of integrations. Integration, when done right, always opens up seamless communication between your most important applications.
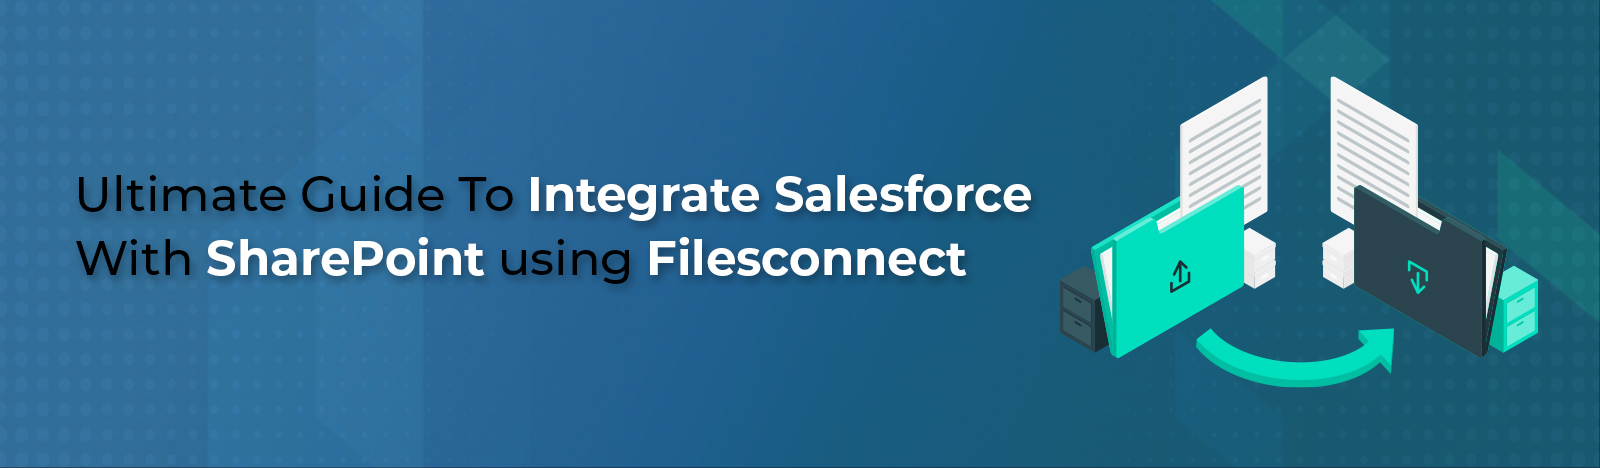
Businesses can enhance managing and securing their documents with Salesforce’s integration with SharePoint, a feature-stuffed Microsoft-powered document management system. Integrating Salesforce and SharePoint is an obvious move for any business that wants to improve processes while keeping all files in one place.
Furthermore, it is one of the most regular customization requests we receive each week.
So, looking at this trend, we thought to bring this article for you to help you with a step-by-step guide on how we can integrate Salesforce and SharePoint easily using Files Connect. Hope this is useful.
How to integrate Salesforce with SharePoint using Files connect?
Prerequisites
Before starting the Salesforce SharePoint integration, you must have-
1) A Salesforce account.
2) A SharePoint account.
3) Working understanding of Salesforce and SharePoint.
How to set up Salesforce for SharePoint Integration?
Files Connect is a powerful platform that makes it easy for enterprises to streamline the process of SharePoint and Salesforce integration. Most companies follow this File Connect platform because it saves time by speeding up the necessary file transfer right after both the software are in sync. The Salesforce SharePoint Integration using File Connect completes within a few minutes with the following steps:
1) At first, you have to navigate to “Salesforce.com” and log in with your Salesforce account.
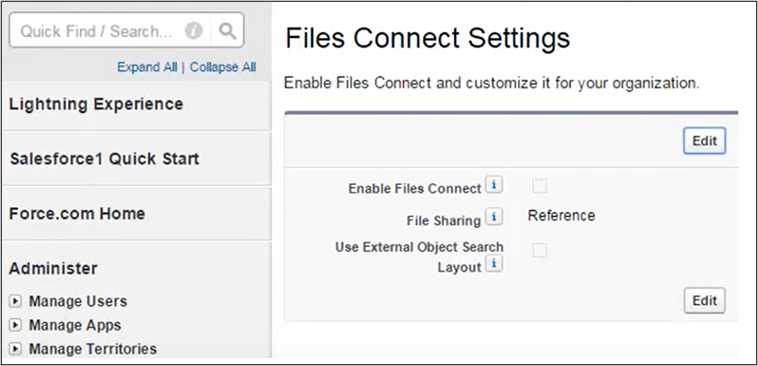
2) After login, type’ Files Connect’ in the Quick Search box and click search. Then click on ‘Files Connect.’
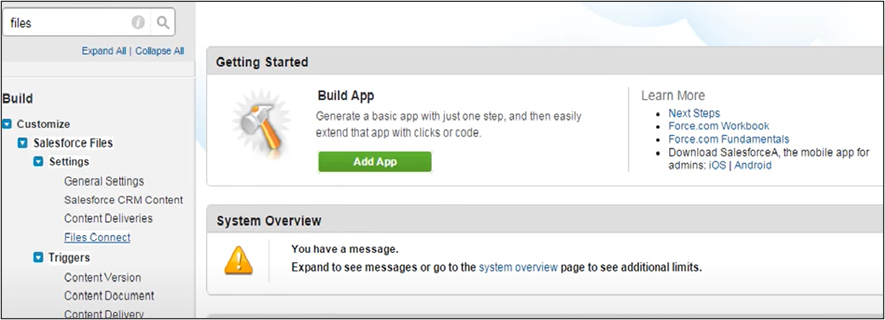
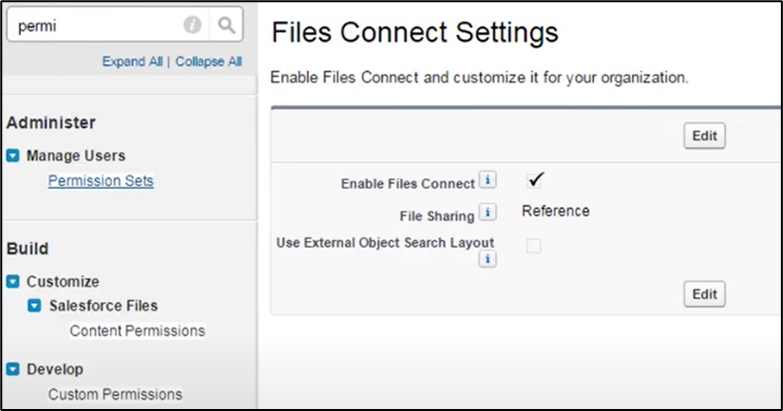
3) Once done, go to the ‘Edit’ option and update the settings as per your conditions. When configuring the settings, be sure to tick the “Enable Files Connect” box.
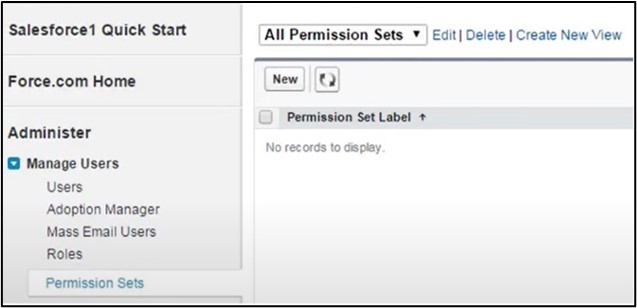
4) Now, on the Salesforce homepage, go to the ‘Quick Search’ box, type ‘Permission Set,’ and click to choose it.
5) Next, click on ‘New”.
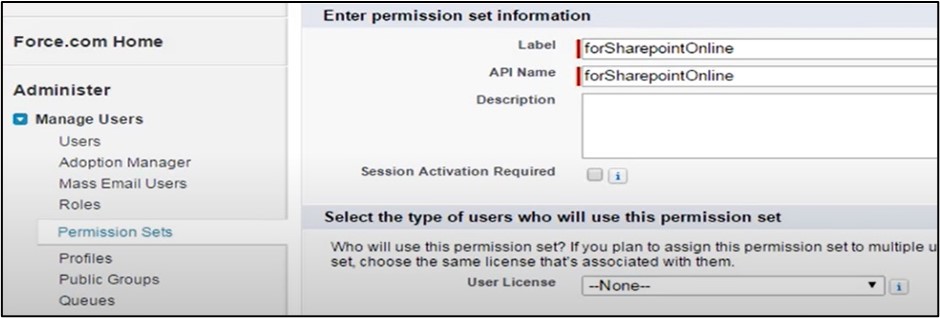
6) Now, fill in the details within ‘Enter Permission set information’ and select ‘User License’ to “None.” Once done, make sure to save the changes.
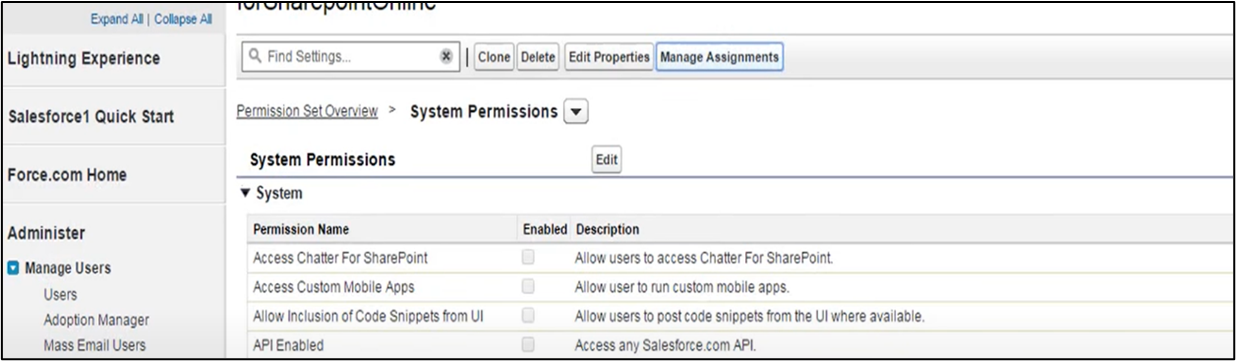
7) Now that you have created a new permission set, it’s time to configure the System Permission.
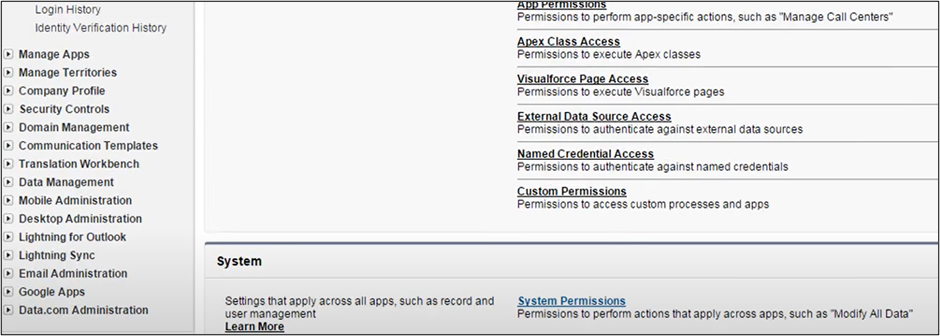
8) To do that, click on “System Permission.”
Now, click on ‘Edit’ and enable the “File connect cloud” checkbox. Once done, click on ‘Save.’
Now let’s assign a user.
9) To do so, go at the top of this page, navigate to ‘Manage Assignments’, and click on ‘Add Assignment.’
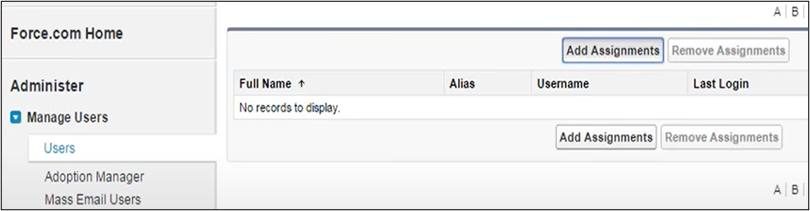
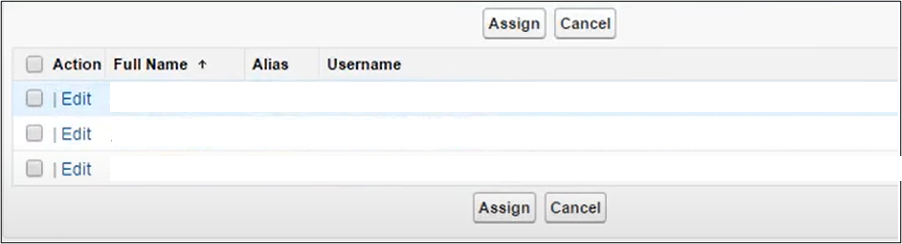
10) Once done, select a user by enabling the checkbox and then click on ‘Assign.’ Now, click on ‘Done.’
As you might be aware that your Salesforce SharePoint Integration requires specific authentications before deploying.
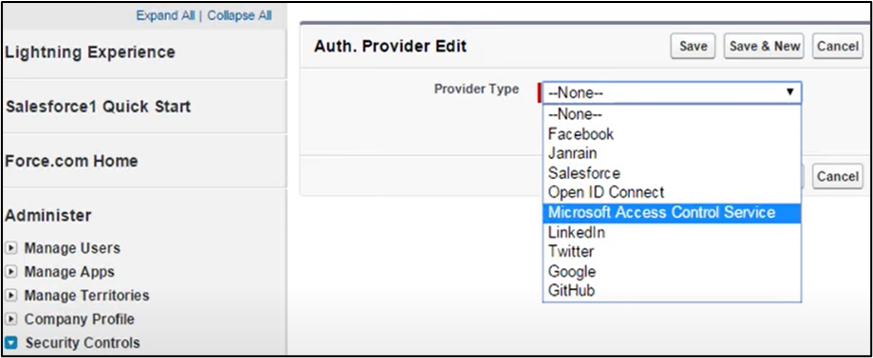
11) To enable this, go to the ‘Quick Search’ box on the Salesforce homepage, type ‘Auth Provider,’ and select ‘Auth Provider’ from the search result.

12) Now, click on ‘New’ and choose the ‘Provide Type’ option. Next, in the ‘Provide Type’ option, select ‘Microsoft Access Control Services’ as the provider of the SharePoint platform.
 13) After that, enter the required details and click on ‘Save.’
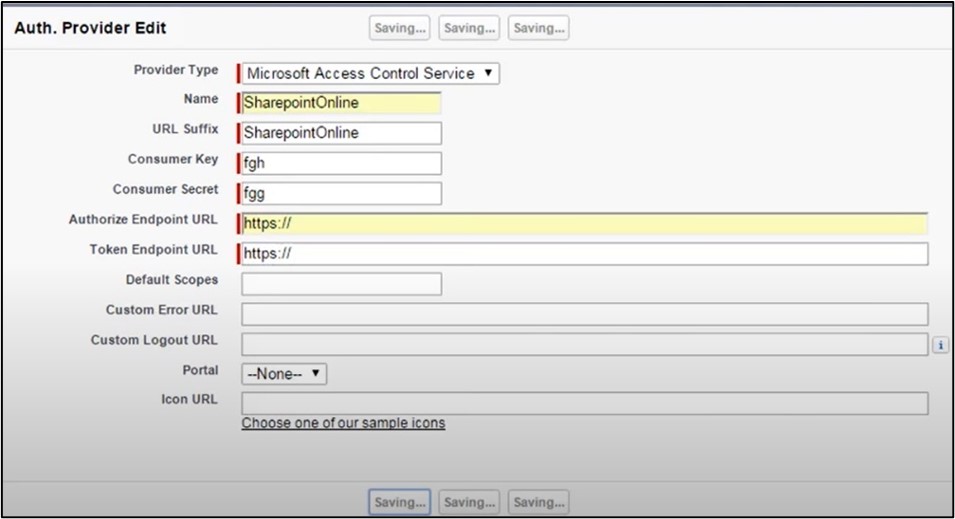
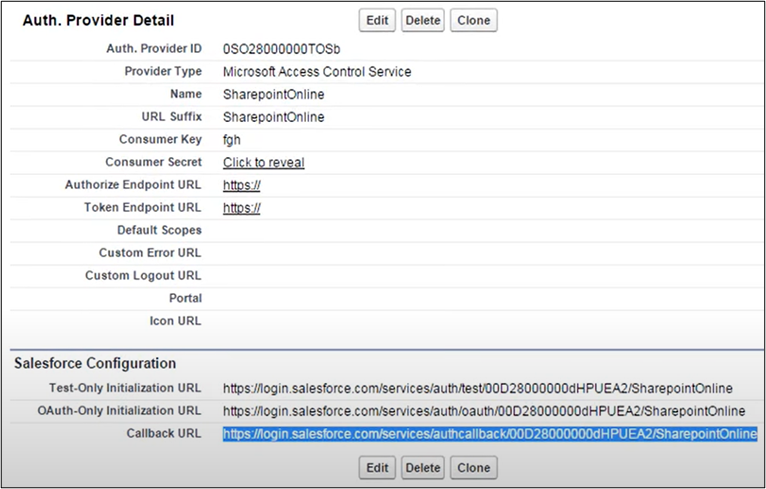
14) This will navigate to the Auth Provider screen that will contain a ‘Callback URL.’ Save this URL as it will be helpful in the next steps of Salesforce SharePoint Integration.
15) You must first configure your SharePoint account before linking Salesforce with it. To do so, log in to your SharePoint account and go to any site collection you want to connect. Take note of the site collection’s location (path); it will come in handy later.
Now, go through the following steps to create a Microsoft 365 application using a ‘Client Sheet.’
(i) Visit the URL: https://[your company name]. sharepoint.com/[site collection path]/_layouts/15/appregnew.aspx].
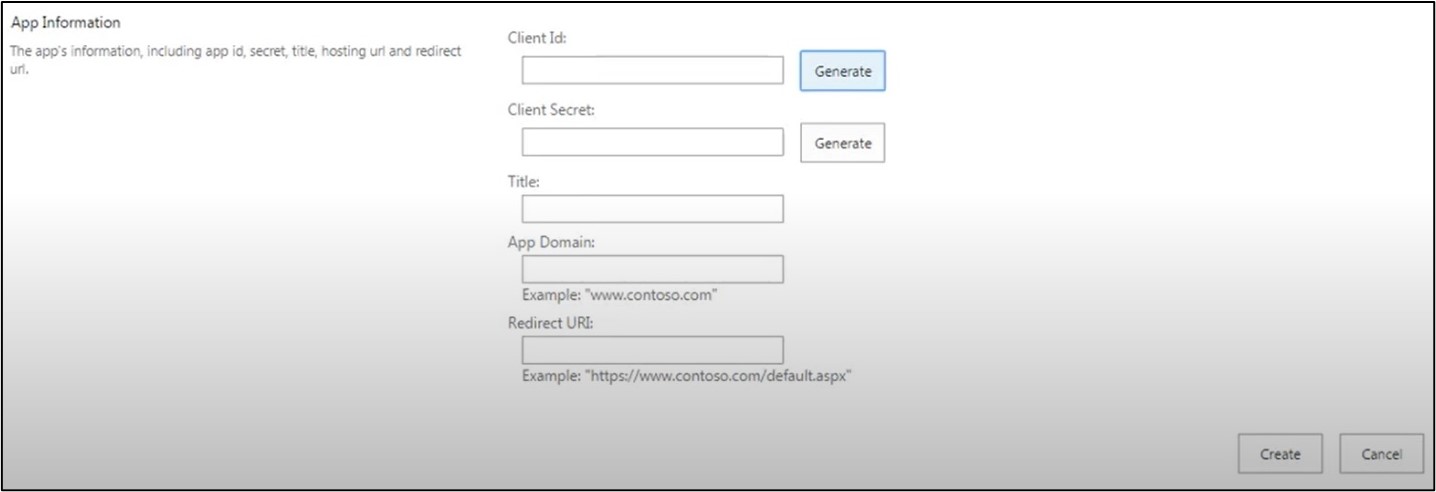
(ii) This will navigate to the App Information page. Now, click on the ‘Generate’ button right to the ‘Client Id’ and ‘Client Secret.’ Office 365 will create Client Id and Client Secret automatically.
(iii) Fill in the title of the app in the ‘Title Field’ and in the ‘App Domain’ field, enter “login.salesforce.com” and in the ‘Redirect URL field’ enter the callback URL which you received at (step 13) and then click on ‘create.’
16) Now, let’s configure the newly created app.
First, go to the following URL-
“https://[your company name].SharePoint.com/[site collection path]/_layouts/15/appinv.aspx”.
This will open a new form.
17) Please note that the App ID here is the Client ID generated in the previous step. So, paste it here and click on the ‘lookup.’
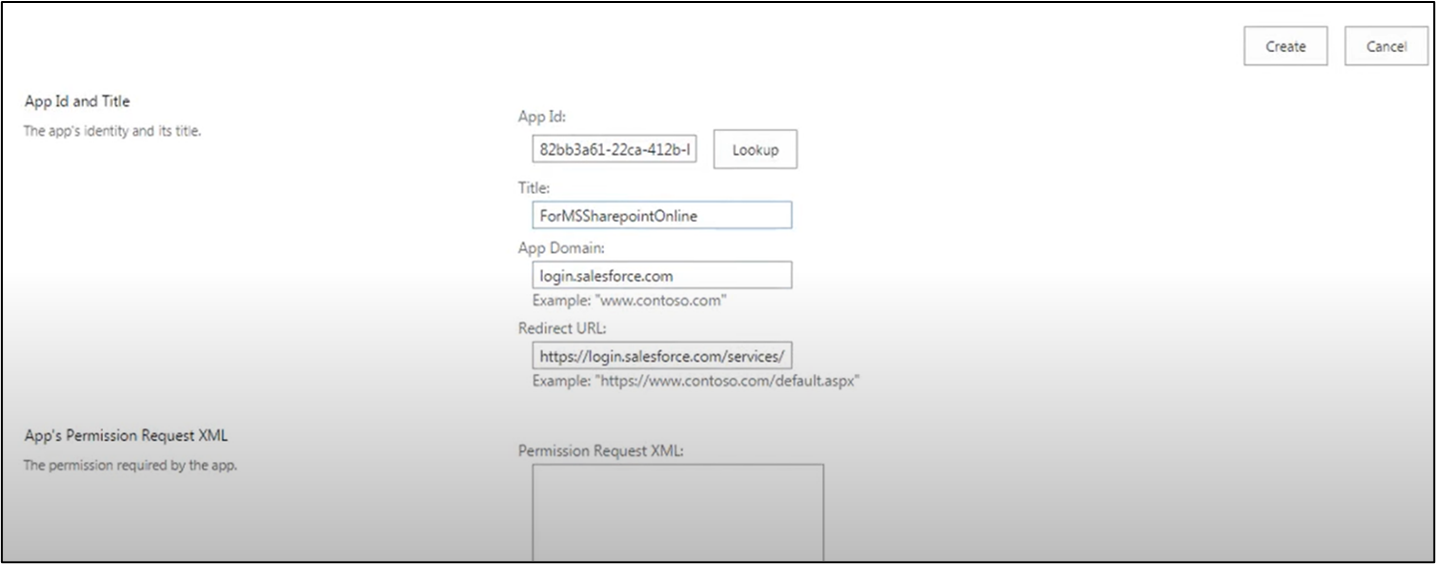
18) When you click on lookup, all the required details regarding this ID will automatically accept the permission request XML field. This field defines the level of access the connecting application will have for accessing SharePoint files collections. Where scope can be-
http://SharePoint/content/sitecollection/web allows Salesforce users to access a single site collection, though you cannot access the subsites.
http://SharePoint/content/sitecollection provides access to a single-site collection and all its subsites.
http://SharePoint/content/tenant – This is used to allow access to all site collections.
19) Now go again on ‘Auth Provider’ and replace ‘Consumer Key’ and ‘Consumer Secret’ with ‘Client ID’ and ‘Client Secret,’ respectively, generated in step 14. In the field of ‘Authorize Endpoint URL,’ you would have to enter:
“https://[your company name].sharepoint.com/[site collection path]/_layouts/15/OauthAuthorize.aspx”. In the field of ‘Token Endpoint URL’ you would have to enter.
“https://accounts.accesscontrol.windows.net/[your company name].onmicrosoft.com/tokens/OAuth/2?resource=00000003-0000-0ff1-ce00-000000000000/[yourcompanyname].sharepoint.com@[yourCompanyname].onmicrosoft.com” and then click on ‘save’.

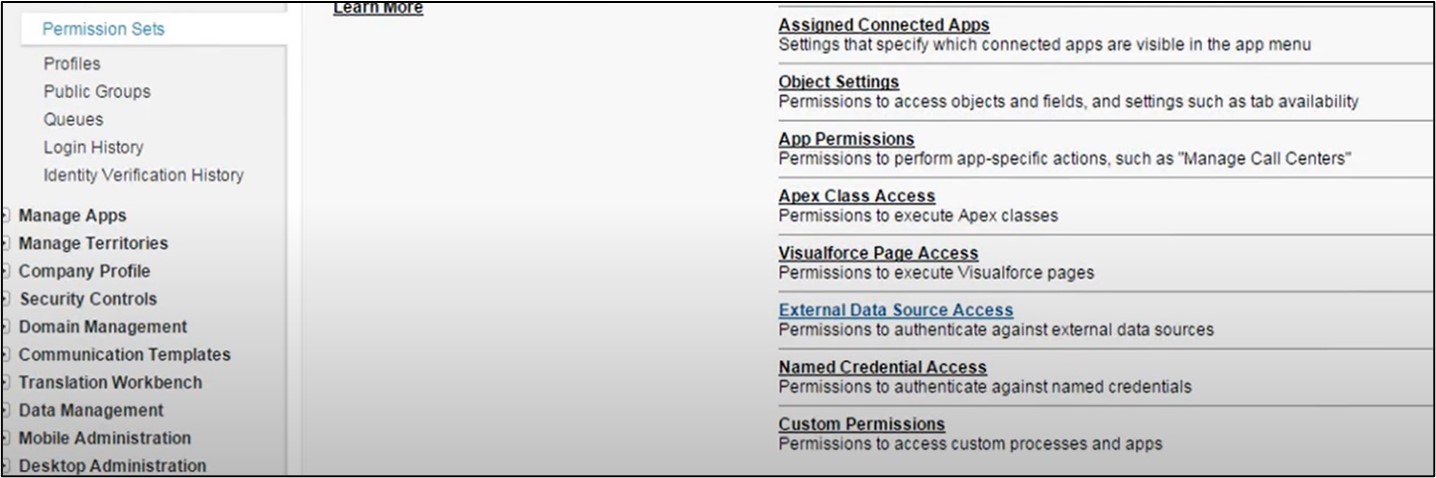
20) Now go to the ‘Quick search box and search “external data source” and click on it from the search result.
21) Next, click on ‘New external data source.’ After that, a screen will appear with some fields.
22) Enter ” File connect ” in the ‘External Data Source’ field and enter “File connect.”
23) Next, select “Files connect Microsoft SharePoint Online” in the’ type’ field. Enter the SharePoint Site collection URL or the sub-site collection URL in the’ Site URL’ file, whichever you are connecting with Salesforce. In the ‘Identity Type’ field, select “Per user.”
24) Now, In the ‘Authentication Protocol,’ select “OAuth 2.0”. In ‘Authentication Provider,’ click on the search icon, select the Authentication Provider that you just created in earlier steps, and click on ‘save.’
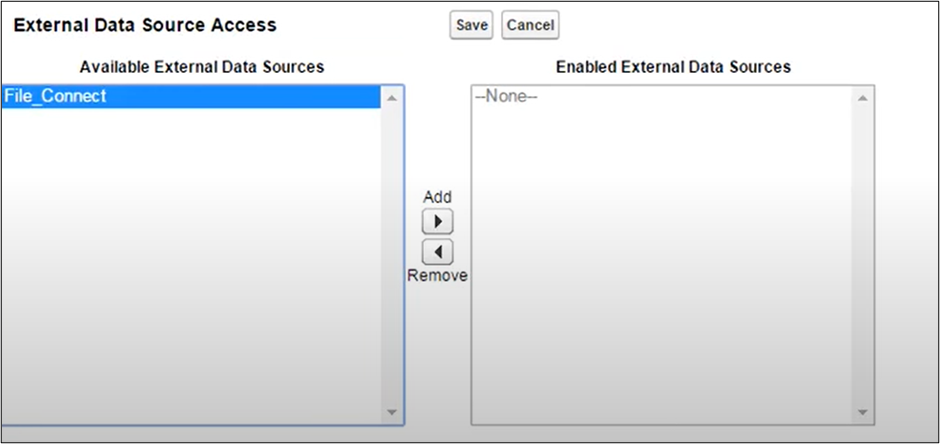
25) You have created the external data source; now, you must enable it in the permission set. So, again go to the ‘permission set’ and open it, go to the ‘External data source,’ and click on ‘Edit.’ Select and add the newly created data source to the Enabled External Data Source section. Then click on ‘Save.’
26) Now you are done; each of your users with the same permission sets will now see SharePoint in the External Files tab.
Conclusion
Salesforce is quite infamous for its limited storage capacity and lack of document management features. Therefore, most enterprises that create and consume documents rely on external document management solutions. They integrate these solutions with SharePoint to utilize the two systems easier.
Often for enterprises, it is challenging to reduce data storage costs or minimize staff workload without SharePoint integration as they have to manage customer information from various places. With SharePoint integration, you can save your business costs, reduce workload and enhance your document management process. SharePoint also supports automatic file versioning for Salesforce documents. This will result in your team having more control over the documentation process. Additionally, you can even study, modify, and share papers online, even from your mobile devices.
Managing your data and organizing documents will no longer be a time-consuming and expensive task. Engaging with the right Salesforce SharePoint Integration partner will make the process faster to automate most of your tasks and provide a single platform for employees to share resources and data.
If your team needs help in Salesforce SharePoint integration, please schedule a free SharePoint consultation with our experts, today.